

1. Get a vulnerability report into Chainloop
Findings come from a workflow that attests a vulnerability report. The quickest way to create one is from a workflow template: in your project, click Create Workflow and search for “vulnerability”. Three templates cover the three ways to produce the report: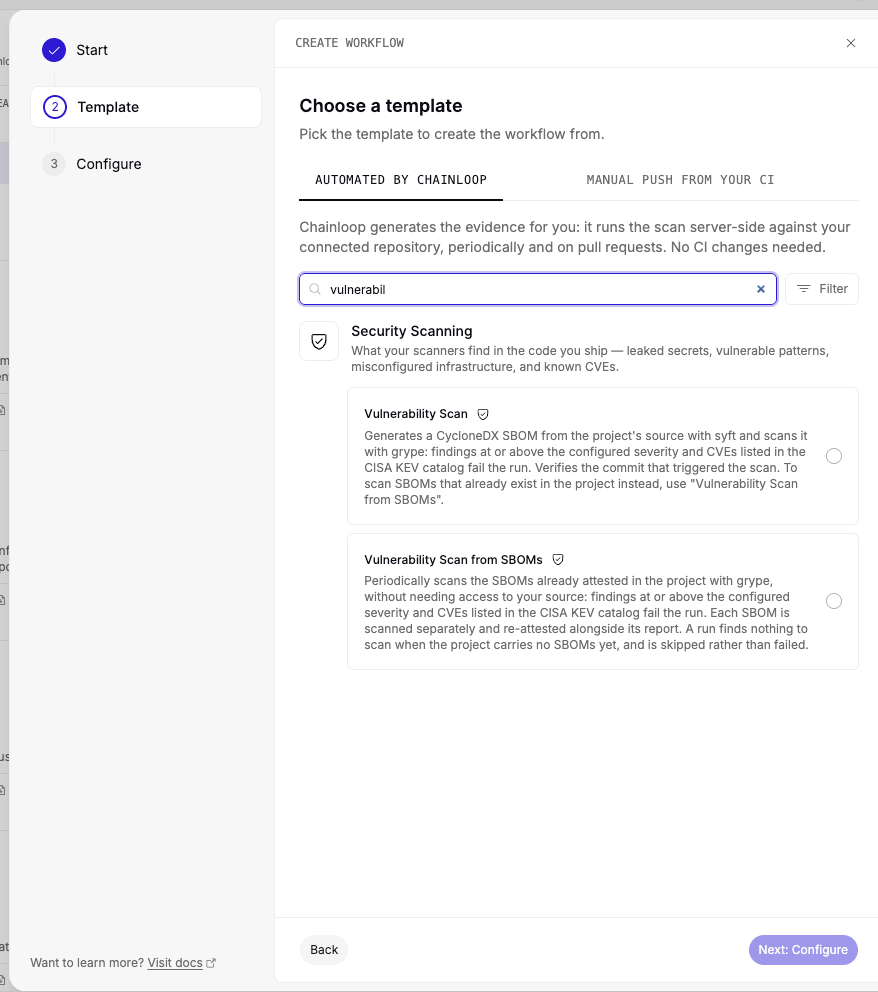
All three attach the same
vulnerability-management policy group, so the Security tab looks the same whichever you pick. Each exposes a severity input (default HIGH) that sets the lowest severity ingested as a finding.
Automated by Chainloop
Pick either automated template, choose its run modes and severity in Configure, and you’re done. The scan runs server-side against a repository connected through GitHub or GitLab. Generate and Continuously Scan SBOMs walks through both modes, and Built-in Scanners lists their inputs and the materials they produce.Manual push from your CI
Pick Vulnerability Scan under the Manual push from your CI tab. Chainloop creates the workflow and this contract for it:chainloop.contract.yaml
policyGroups block to its contract instead.
Only the vulnerability report is required. The other two materials are optional but unlock additional views and traceability; for a report format other than SARIF, change the vulnerability-report material type accordingly.
A CycloneDX SBOM that carries vulnerabilities covers the report and SBOM inputs in one file. Without an artifact reference, Chainloop uses the one declared inside the SBOM, but it won’t be tied to an attested build.
Attest your materials
Inside your CI/CD pipeline, initialize an attestation, add the vulnerability report (plus any optional materials), and push it to Chainloop:Run the workflow
Whichever path you chose, once the first run lands and the policy evaluates the evidence, the Security tab fills in:- Components as soon as the SBOM is parsed
- Vulnerabilities when the scan report runs through the policy
- Artifacts under the image reference
- Reports with PDFs and VEX once you approve assessments
2. Perform your first risk assessment
With findings flowing into the Security tab, walk through the triage loop end-to-end on a single CVE so you’ve seen every step before scaling up.- Open Overview and check the unassessed Critical/High count.
- Click View Unassessed to land on the filtered Vulnerabilities list.
- Open a finding and write (or accept the agent’s draft) assessment.
- Approve the assessment. The finding moves out of the active backlog.
- Share the auto-generated VEX feed URL with your customers and control gates.
Next Steps
- Attach a compliance framework to your product — for example, the Cyber Resilience Act (CRA), SSDF, or your own best-practices framework — so the same SBOMs, scanner reports, and assessments drive your compliance posture automatically
- Enable the Vulnerabilities Agent to draft assessments automatically (Preview)
- Wire notifications to Slack, Teams, or email
- Update your control-gate policies to read assessments, so dismissed findings stop blocking the release
Troubleshooting and FAQ
I don't see any vulnerabilities
I don't see any vulnerabilities
Two things to check:
- Confirm your vulnerability report is being evaluated by the built-in
vulnerability-managementpolicy group or thevulnerabilitiespolicy. Vulnerabilities only surface when a policy parses the report — without it, the material is attested but not turned into findings. If neither is attached, add one to the workflow’s contract and re-run. - Make sure you’re on the Enterprise Edition CLI v1.73.0 or later. Earlier versions don’t emit findings into the Security tab.
I see fewer vulnerabilities than my scanner reports
I see fewer vulnerabilities than my scanner reports
Expected. Entries below the policy’s
severity threshold are never ingested, and entries for the same vulnerability and package collapse into one finding. To see lower severities, lower severity in the workflow’s contract (or the template’s Configure panel) and re-run. See What becomes a finding.I don't see any components
I don't see any components
Components are extracted from the SBOM. If the Components view is empty, your attestation is missing an SBOM material — add a
SBOM_CYCLONEDX_JSON (or SBOM_SPDX_JSON) to the run and re-attest.