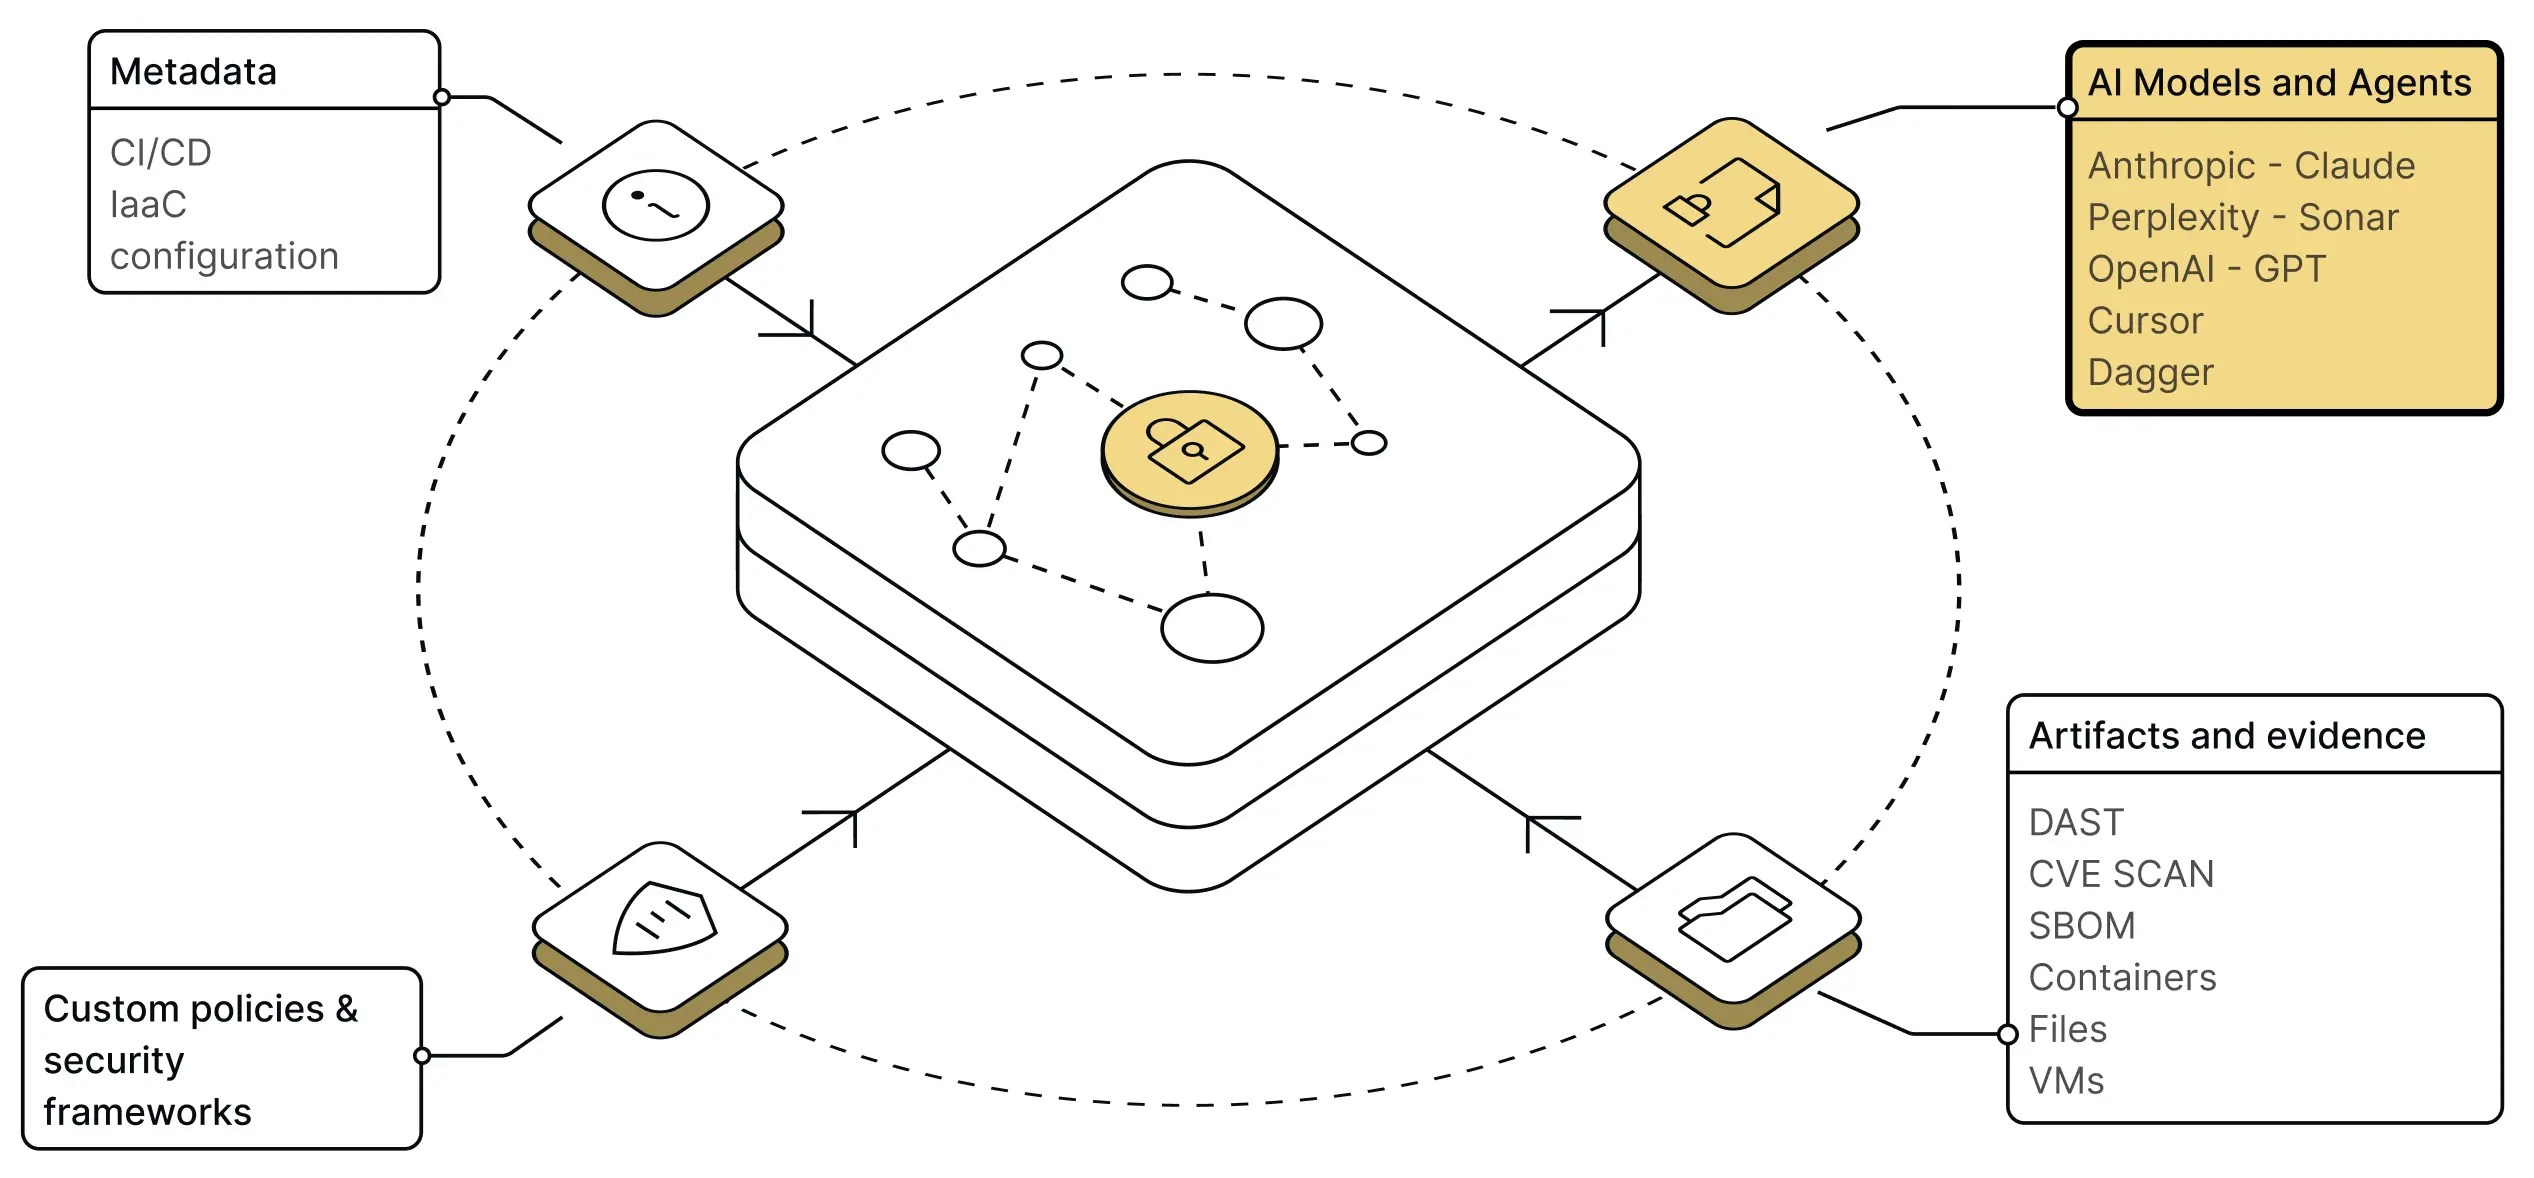
Chainloop remote Model Context Protocol (MCP) server is a new way to interact with Chainloop natively from your AI clients or agents. This allows you to perform complex queries, craft compliance reports, or implement advanced agentic workflows. All of this done securely, using the data already stored and signed in Chainloop.
How to connect to the MCP server
If you are running your own instance of Chainloop platform, first, make sure to enable the feature by following this guide. https://api.app.chainloop.dev/mcp. For authentication, the MCP server supports OAuth2 user auth and API token authentication via CHAINLOOP_TOKEN (see API tokens).
Our server is been tested against the following MCP Clients: Claude Desktop, Cursor, Visual Studio Code, Dagger, and OpenCode. Below you will find some examples, if you can’t find yours, please refer to their documentation.
mcp-remote is used only for Claude Desktop as a temporary workaround until native Streamable HTTP support is available.
Claude Desktop
You can configure the MCP server in Claude Desktop please follow this example to find the configuration file but add the following MCP configuration instead.
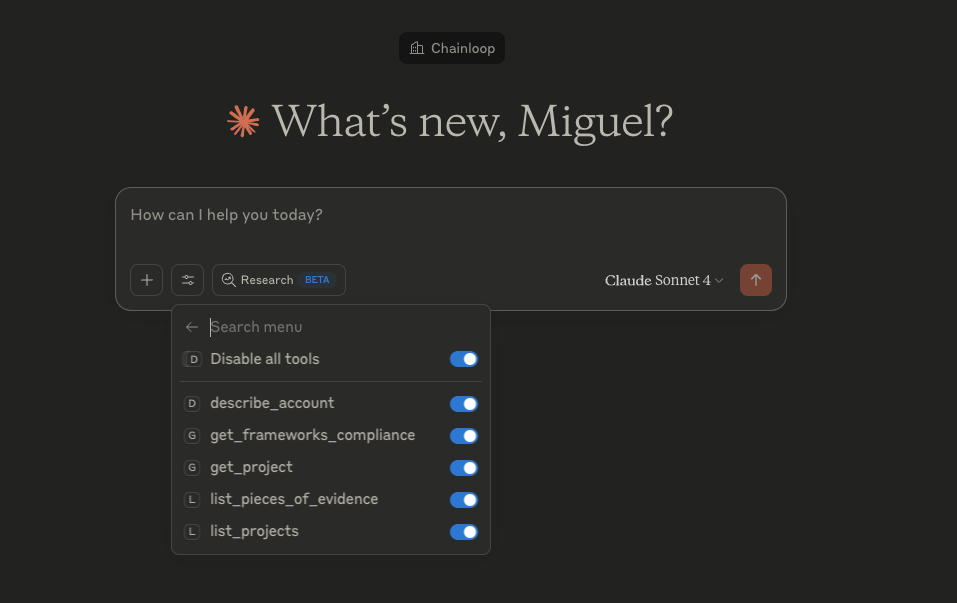
Once you enable it and restart the Claude, you will set the list of tools next to the prompt.
Claude Code
Claude Code also supports MCP servers. You can configure the Chainloop MCP server using the claude CLI command, or manually add the configuration to your Claude Code settings file:
-
Open Claude Code settings by running the command
/settings or by opening the settings file directly at ~/.claude.json (Linux/macOS).
-
Add the following MCP server configuration:
Set CHAINLOOP_TOKEN to your Chainloop API token.
- Restart Claude Code for the changes to take effect.
Once configured, Claude Code will automatically connect to the Chainloop MCP server, and you’ll be able to interact with Chainloop directly from your AI coding sessions.
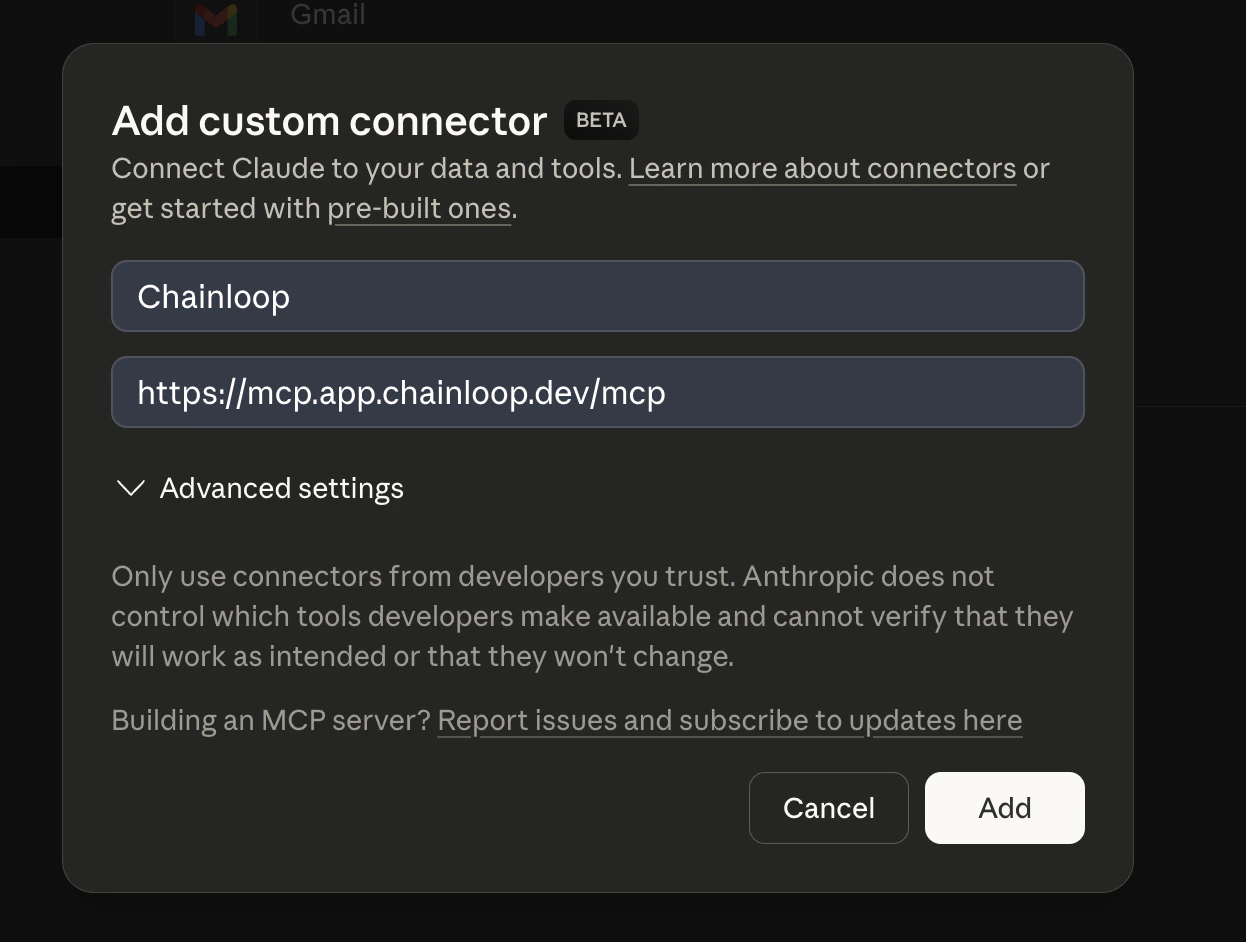
Claude.ai
If you are using Claude.ai, you can connect to the Chainloop MCP server by creating a custom connector. Go to the Connectors settings, add a custom connector pointing to https://api.app.chainloop.dev/mcp.
ChatGPT
If you are using ChatGPT, you can connect to the Chainloop MCP server by creating a custom connector that points to https://api.app.chainloop.dev/mcp.
Cursor


OpenCode
OpenCode supports remote MCP servers natively. You can add the Chainloop MCP server using the opencode CLI, or manually add the configuration to your opencode.json or opencode.jsonc:
- Add the MCP server using the
opencode CLI:
Set CHAINLOOP_TOKEN to your Chainloop API token.
- Alternatively, add the server manually to your config file:
Set CHAINLOOP_TOKEN to your Chainloop API token.
- Restart OpenCode for the changes to take effect.
Once configured, the Chainloop tools are available alongside the built-in tools. Reference them in prompts with use the chainloop tool, or add a rule to your AGENTS.md: